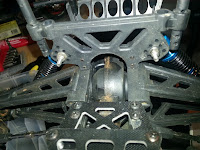
One of the new replacement shocks for my Turnigy Trooper that I completed back in early July broke. My daughter was on the throttle wide open and hit a fence at the ball field and the front right shock assembly broke off at the top mounting point. This is mainly due to the fact that these are plastic ball cap mounting type shocks (not ideal of course, but affordable compared to all Aluminum shocks--about 3x the cost).
First, I opened the new shocks and ensured the silicone damper oil was correctly filled, it wasn't but that is expected from Singapore parts. So I filled with 40w Factory Team shock oil and bled out the air bubbles. The actual mounting to the Turnigy Trooper's Shock Tower requires a plastic spacer sleeve that was also destroyed in the accident. So I had to order a 2-pack of them from Turnigy in Singapore, which took about 2 and half weeks to arrive (.26 cent part!). That again identifies the risk you assume when you order a budget RC model from an overseas manufacturer like Hobby King. Hobby King advertises they have a US-based warehouse, but my experience says differently as everything I've ordered (even when selecting the US warehouse on their website) still ships from Singapore.
Here is the bag with the new Turnigy shock spacer sleeve part. I've attached the new shock along the bottom at the wheel brace. That is the .26 cent part in my hand.Using the same new stainless steel hardware used previously, I am mounting the new replacement 85mm shock (purchased on eBay from the same RCBattery2011 seller as before).
Here the repair job is completed, at a total cost of about 5 dollars--so not bad at all for the first bashing accident! And honestly this is to be expected with the RC vehicle hobby.
While I had the 1:10 Turnigy Trooper 4wd SCT on the workbench I decided to do a little PMCS work. Here I apply a very light coat of Model Railroading Engine Hob-E Lube to the main gear spur and motor spur. I then take a rag and hover over the spurs and apply full power to motor to spin-off any excess lube.
Previously I had attempted to water-proof the transmitter receiver within a small zip-lock bag. I noticed after some running time that the bag had worked itself open. So I used some Automotive Goop adhesive/sealant to seal the bag shut. Will be simple enough later if I need to work on the transmitter to just cut the bag off the wires and replace the zip-lock baggy.


No comments:
Post a Comment